Building a 100-Series Caboose
in HO Scale
By Brian Everett
PAGE ONE

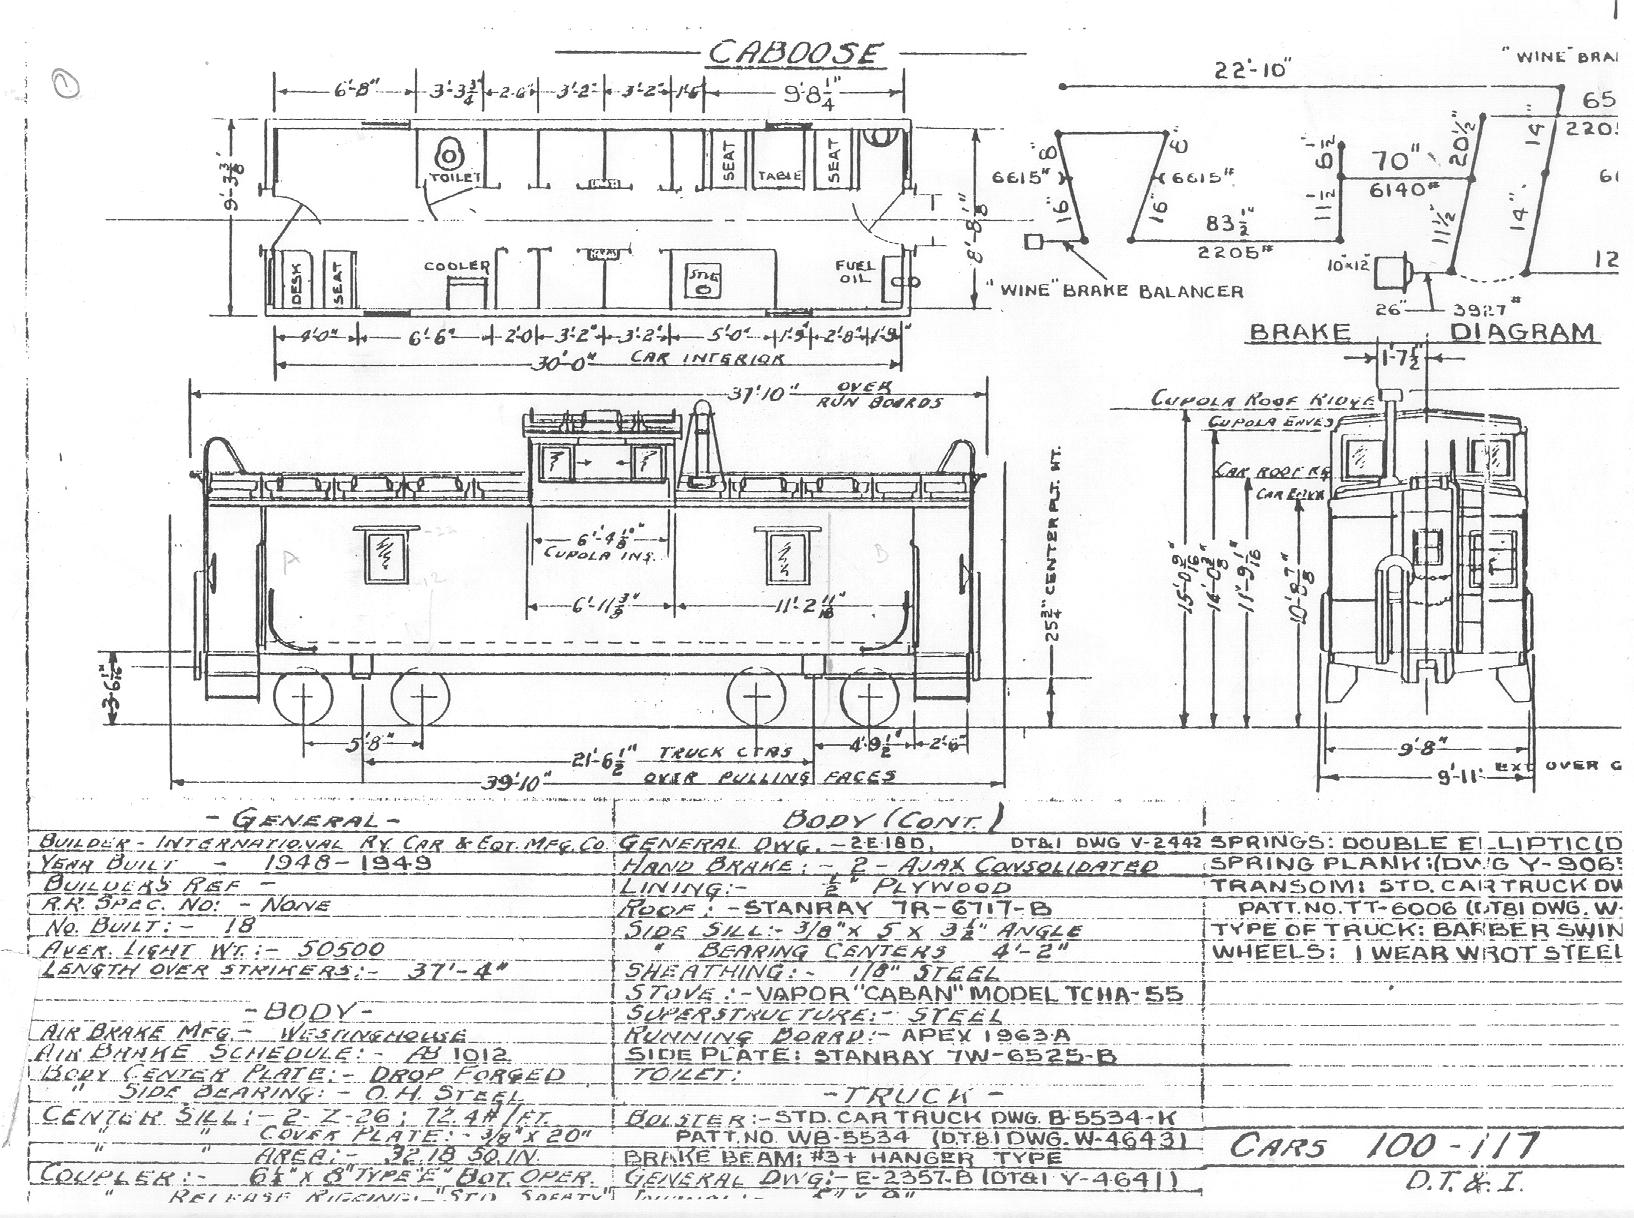
Prototype equipment diagram. Click to view a larger
version (368k).
Diagram courtesy of Brian Everett
2 Athearn WV caboose kits are required. Cut off the
center tabs that are in the center that locks it to the underframe, remove
just the part that snaps it in, as this will get in the way later.
 Place
a flat block of wood that is thicker than the roof overhang on the caboose
body on your workbench, and stand body A on its end (short roof side
up) with the roof overhang pressed against the side of the wood block.
Place
a flat block of wood that is thicker than the roof overhang on the caboose
body on your workbench, and stand body A on its end (short roof side
up) with the roof overhang pressed against the side of the wood block.
Measure up from the end 2-3/16 inches, and cut off.
Leave the line when you cut, and use a file to square the joint to the
line.
Repeat previous 2 steps for body B, but measure up
2-7/32, and cut off.
 Once
the body cuts have been filed square, glue the 2 ends together. I glued
a reinforcement strip to the back of each side first to simplify this process.
Once
the body cuts have been filed square, glue the 2 ends together. I glued
a reinforcement strip to the back of each side first to simplify this process.
Also fill in the opening in the center of the body
by cementing in a styrene filler piece. Make the underside of the cord
between the body and roof the top of the styrene filler piece.
Fill left side end window on both ends, A and B.
Fill all side windows, remove all seams on sides, remove all cast on handrails.
Sand body smooth where these details existed.
Fill all holes in the body roof with putty, and sand
smooth.

Send EMail to the DT&I Modeler's
Page!
Go Back to Model Building Articles